Do you need a solution for fixing the plaster on your walls that will last? Is the building's structural integrity compromised to the point that it is about to collapse or lean dangerously to one side? Plaster walls that are crumbling are an eyesore, but they can quickly escalate into an expensive disaster if proper action is not taken.
DIYers and professionals can benefit from this article's detailed instructions and advice on fixing crumbling plaster walls.
Before attempting to fix a crumbling plaster wall, it is important to conduct an integrity test to determine if the plaster is damaged, to what extent, and where the damage is occurring on the wall.
Once that's done, you should zero in on the problem's origin; plaster fixes often fail again because the underlying cause wasn't fixed.
After taking the above precautions, rake down the powdery wall surface to remove any remaining paint and loose particles. The damaged area must be removed, and then the patch must be applied using identical materials to the original plaster.
Repair the wall cracks properly if the crumbling plaster results from such damage. It's also possible that you'll need to repair some cracked or otherwise unsteady plaster.
Plaster the patched area until smooth, then wait for it to cure fully. Major wall repairs should be discussed with an expert before being attempted.
To begin the restoration process, it's crucial to address the underlying causes of the plaster deterioration. Pest infestations, such as termites or ants, can contribute to the crumbling of plaster walls by nesting and tunneling within them. Conduct a thorough inspection to identify any signs of pest activity, and consult with a professional pest control service to eliminate the infestation before proceeding with the repairs.
Once the pests have been eradicated, you can focus on repairing the crumbling plaster. Remove loose or damaged sections carefully, and apply a suitable plaster patching compound to fill in the gaps. Reinforce the repaired areas with mesh or tape for added stability. Finally, consider applying a protective coating or sealant that acts as a barrier against pests, preventing future infestations and preserving the integrity of your restored plaster walls. By integrating pest control practices with the restoration process, you can ensure a long-lasting and pest-free environment within your home.
Factors Contributing To Crumbling Plaster Walls
Plaster that is crumbling can be an annoying and even dangerous problem for homeowners. However, plaster crumbling can be a sign of a larger problem, so it's important to get to the bottom of what's causing it. The following are some common factors that lead to plaster walls crumbling:
Infiltration Of Moisture
Plaster walls often crumble because of water damage. Plaster crumbles as water penetrates its surface, weakening its relationship to whatever lies beneath it. Pipe or roof leaks, excessive humidity, and condensation on walls are all potential culprits. Rain and snow are two examples of outside moisture sources.
Structural Movement
Plaster walls aren't meant to be flexible, so cracks and crumbling can appear as the building ages and experiences settling or foundational shifts. Several factors can contribute to these shifts, including the structure's weight, earthquakes, and soil erosion.
Impact And Vibrations
Plaster can come loose and deteriorate from excessive vibrations or accidental impacts. For example, vibrations from a nearby road or construction site can damage plaster. The same happens if you bump into the wall and the plaster breaks or crumbles.
Lack Of Maintenance
When regular maintenance is put off, the ageing process speeds up. Plaster can quickly crumble when even minor damage, such as cracks or chips, is ignored. Plaster can also deteriorate without regular maintenance, like putting on a fresh coat of paint or sealant.
Required Tools And Materials
Certainly! Here is a more extensive list of what you'll need to repair crumbling plaster walls:
Scrapers And Putty Knives
Putty knives and scrapers serve various functions, so stock up on both. These implements are crucial for repairing walls that have plaster that has come loose or is crumbling. While a wide scraper is useful for removing large chunks of damaged plaster, a smaller putty knife is better suited for precise scraping and smoothing.
Joint Compound
A joint compound is needed to fill in larger holes and cracks in the plaster. It's a multipurpose material that can even out uneven surfaces and fill in larger cracks.
Paint And Primer
Priming and painting the walls are the final steps after any necessary repairs. Priming before painting helps the paint stick properly and creates a more consistent appearance. If you want everything to blend, pick a paint colour identical to the one already on the walls.
Vacuum Or Brush Cleaner
Remove any loose plaster, dust, or other debris from the wall's surface before beginning the repair process. Any stray dust or debris can be brushed away or vacuumed using a brush attachment.
Protective Equipment
Protect yourself during the maintenance process by donning the appropriate safety gear. Eye protection, hand protection, and respiratory protection from dust particles are all included in this kit.
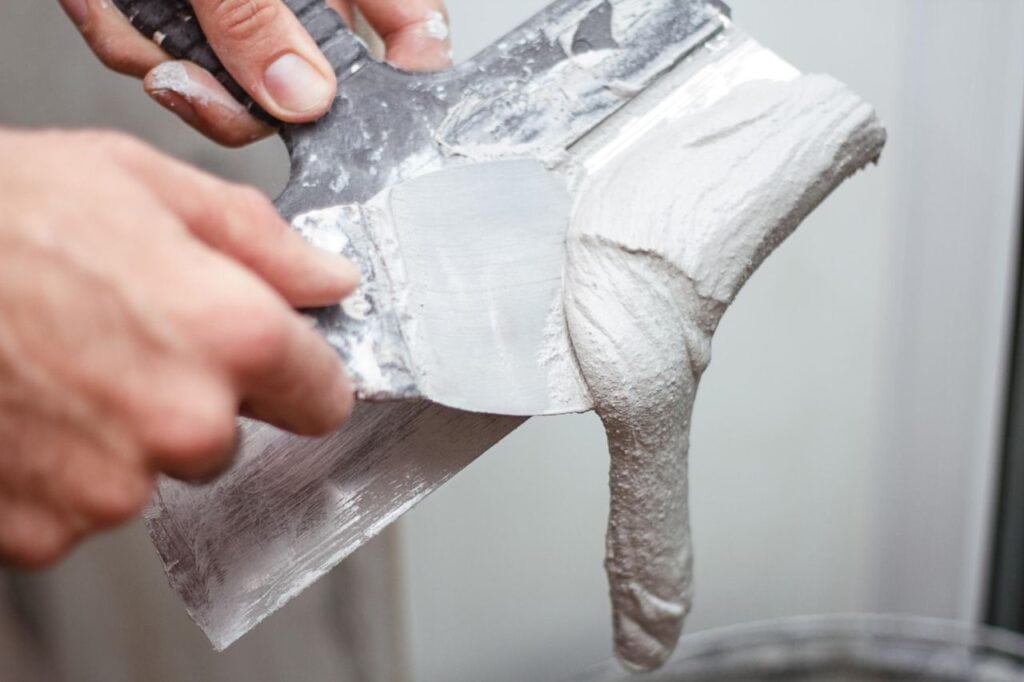
Repair Compound For Plaster
A damaged plaster cannot regain its original strength or appearance without using a plaster repair compound. This material is designed to provide a strong and long-lasting repair on plaster surfaces.
Sanding Block And Sandpaper
To finish the repairs, you'll need a sanding block and a variety of grits of sandpaper. After the repair and joint compounds have been applied, sanding helps to smooth the transition back to the original plaster.
Sheets Of Plastic Or Drop Cloths
Before beginning any repair, cover the floor and nearby furniture with drop cloths or plastic sheets to contain dust and debris. This will facilitate cleanup efforts and reduce the likelihood of collateral damage.
Repairing Crumbling Plaster Walls
Check The Plaster's Integrity

Plaster damage usually leaves clues ranging from the immediately obvious to those that require simple diagnostic procedures. Remember that it will be easier to fix these issues if you catch them early on.
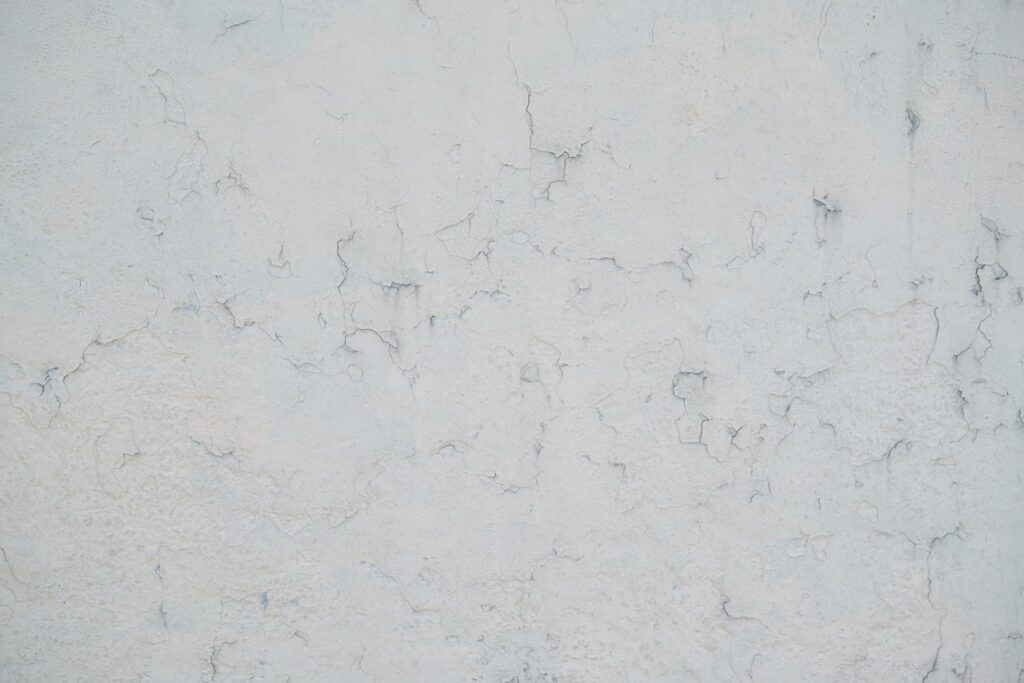
Dampness on the wall is the first visible sign. Plaster damage, in the form of discolouration and stains, is another indicator of water intrusion. When plaster absorbs too much water, it can become stained and develop bubbles and bulges.
The emergence of fractures and splits in the plaster is another red flag that something strange is about to happen to the wall. As soon as the plaster begins to crack, the holes will continue to widen until the entire surface is ruined.
A hollow sound when lightly tapping on a plaster wall is further evidence that the wall's integrity is deteriorating; this suggests a space between the plaster and the other materials making up the wall, as the word "hollow" suggests.
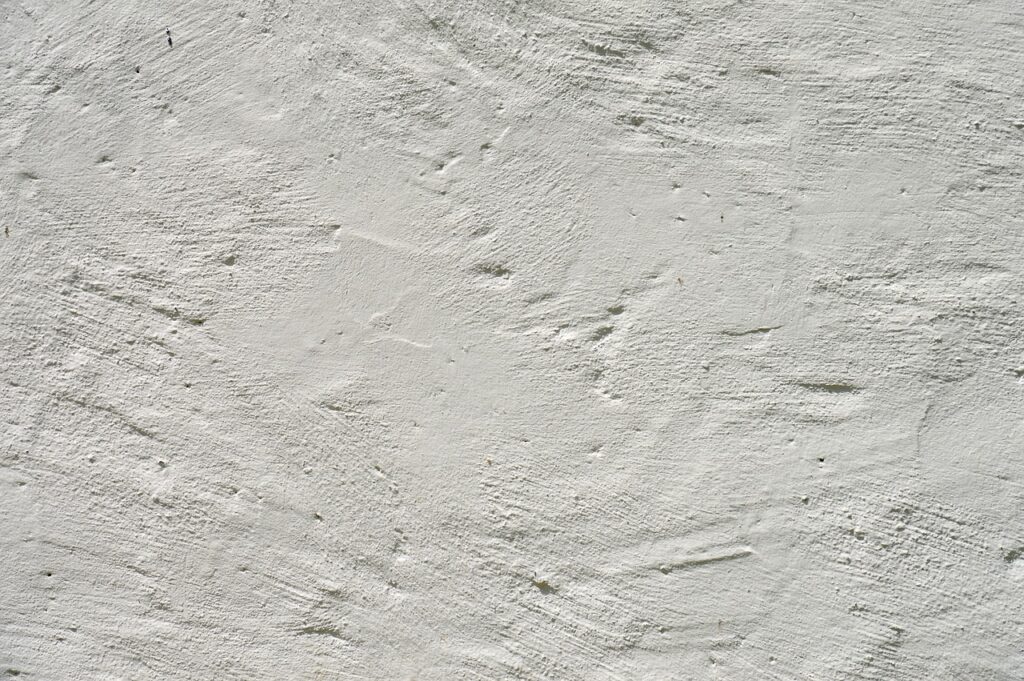
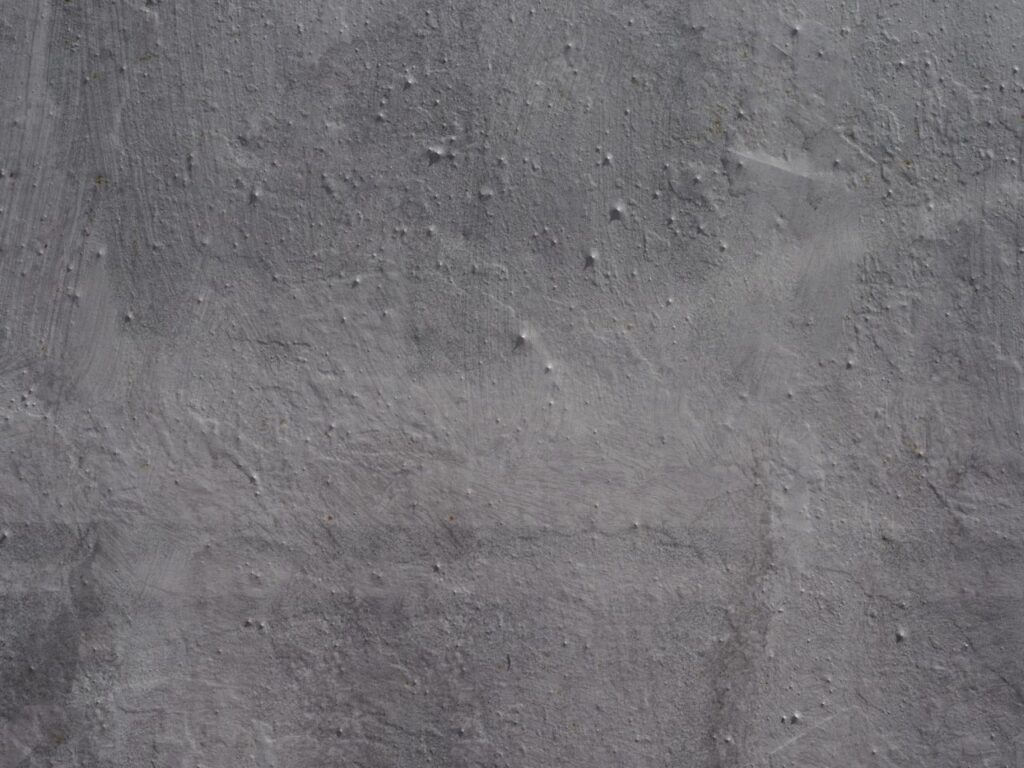
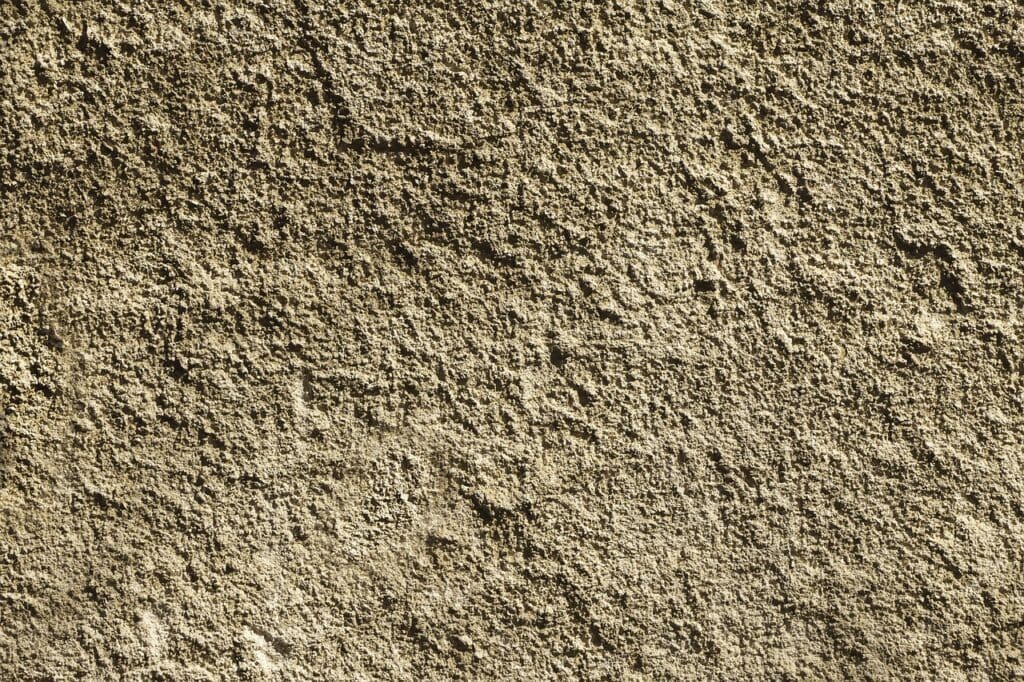
However, the crumbling typically manifests as a fine white powder deposited on the wall surface, then either falls off on its own or is brushed away. Plaster bulging or broken into chunks is easy to spot, especially if a large, boulder-like piece has come loose from the wall but is still attached.
If your wall has any of these signs or a combination, it's probably crumbling or at least in danger of crumbling.
Find Out What Is Causing The Problem
When plaster deteriorates, a fine powdery substance forms on the wall's surface as a byproduct of a chemical reaction. This occurs when the plaster's soluble salts and minerals dry and deposit themselves on the surface.
This is called efflorescence, and while it's a fairly natural process, it can backfire in the long run if you let it keep going unchecked. Plaster's strength comes from the bonding of its basic components (cement and sand), and since water is used to aid in this bonding, weak plaster can easily crumble.
Leaks are the leading cause of discoloured and stained plaster. Water penetrating plaster after it has cured causes it to swell, become discoloured, and become a burden. In addition, the plaster becomes more cumbersome and weaker because it loses its gripping capacity. Keep the wall dry if you can by sealing any cracks or holes that might let water in.
If tapping the plaster yields a hollow sound, it has likely delaminated from the underlying structural elements of the wall. The plaster has flaked off a brick masonry wall and is no longer holding the wall together. Gravity does its damage to the plaster until there is nothing left to support it.
When plaster begins to sag or bow, however, the cause is more sinister. Plaster in stud walls can sag or curve if the wooden laths that support it rot.
Plaster walls can crack due to stresses caused by things like house settlement, earthquakes, and ground movement or shifting. In addition, if the proper mixing ratio is not employed during construction, a plaster wall may crack for reasons other than the elements.
Skim Plaster Over Powdery Surface
Remove the flaking plaster from the wall with a builders' brush. This is crucial because it may reveal additional damage hiding beneath the surface. After the top layer of plaster is stripped away, any cracks or flaws become immediately apparent.
Raking also aids in the removal of flaking paint from the surface. Old paint may peel in areas where crumbling plaster once was painted, exposing more plaster to the elements.
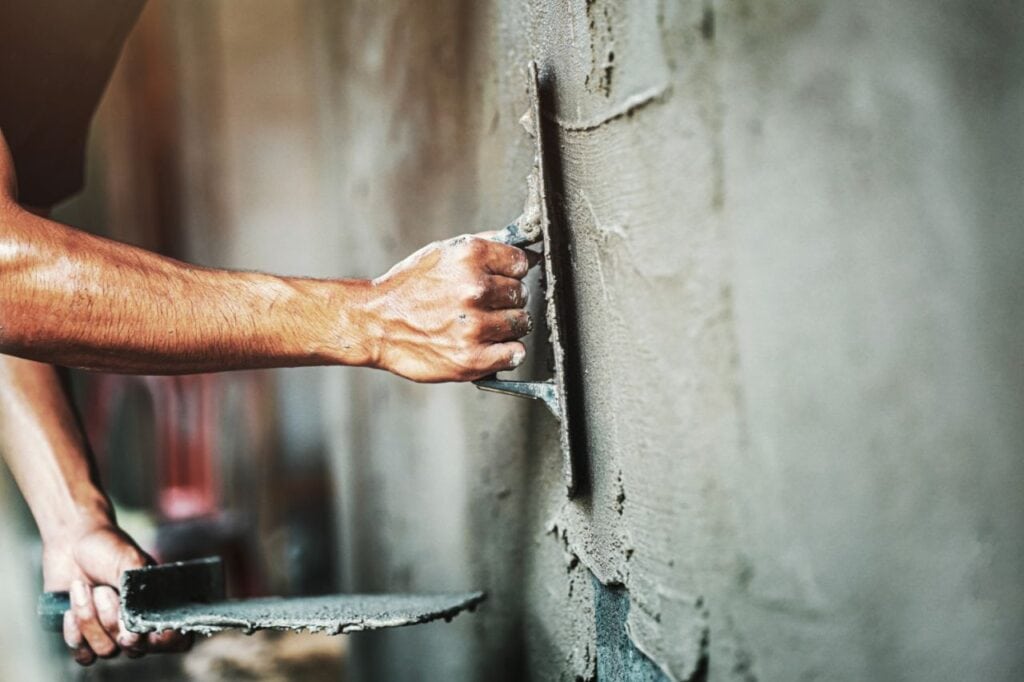
Repairing damage limited to the wall's surface may be possible by applying a skim coat of plaster and then brushing it off.
Repair And Patch The Damage
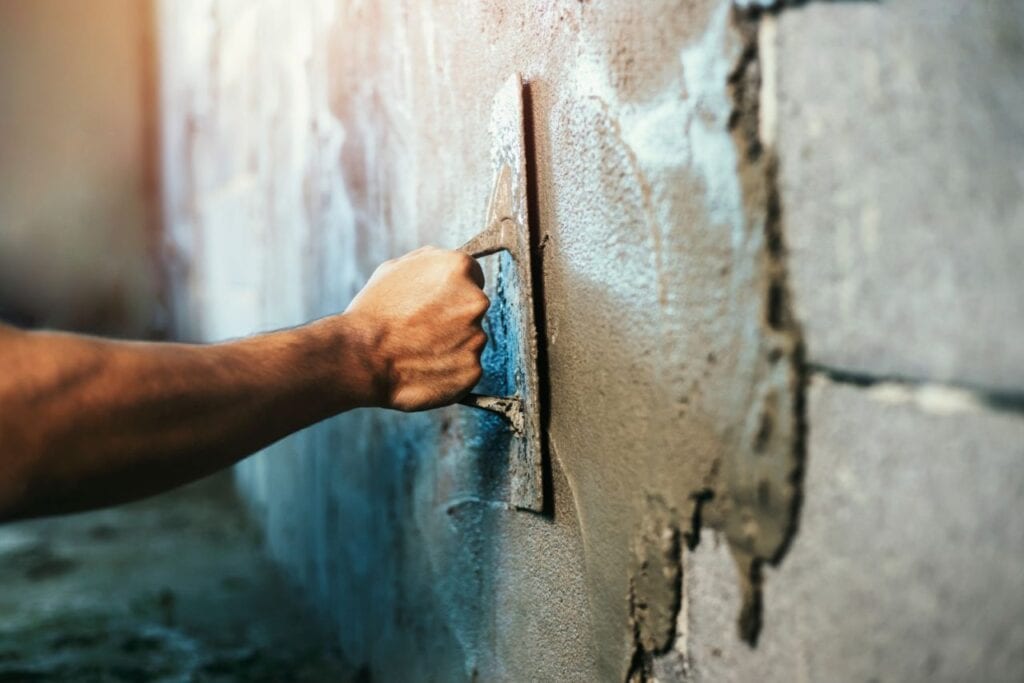
If the damage to the plaster goes below the surface, it must be scraped off and patched. Get down to the lath by scraping away the loose debris.
The damaged area must have all loose debris and aggregate-sized plaster removed. You should be left with A solid wall with holes and other damage that needs fixing at the end of the process.
Drywall should do the trick for filling in the gaps left by the missing pieces. Next, attach it to the lath with drywall screws for added security. After the damaged area has been patched, it must be concealed with a mask. Next, skim the repaired area with plaster or joint compound made to professional standards, and then apply a finishing coat to blend it in.
Repair Any Wall Cracks
Skim coats or joint drywall compound is not preferable when repairing small and large cracks. Even after applying a coat of plaster, the fissures will eventually show through again. This is especially the case if the stresses leading to the cracks result from changes in humidity or house settlement.
Although these factors naturally occuring and cannot be avoided, stress cracks can be avoided permanently by concealing them.
To finish, extend the plaster skim coat about 8 inches on either side of the crack. Plastering over the mesh with more compound helps hide the cracks and smooth the finished product. A joint compound can achieve a smooth surface finish over self-adhesive fibreglass mesh, which can stick to the plaster independently.
Repair Holes
Impacts, such as when a doorknob slams into a wall with sufficient force, are a common cause of holes. Brushing away the damaged and loose debris from a hole is the best way to fix it. But first, you must clean out the hole and file down the rough edges so the patching plaster has something solid to adhere to.
Making a batch of lime plaster for filler is the next step. Again, it's important to use a softer, slower-setting plaster for patching holes. Then, patch the crack with the putty knife. Finally, add a finishing coat of joint compound.
A powder filler is preferable for larger holes because it is less expensive and can be mixed on the spot. In addition, powder fillers can be used indoors and outdoors to patch holes.
Secure The Popped And Loose Plaster
If a plaster key is broken, the plaster around it can come loose from the wall. It's also possible that the plaster will crack or bulge as a result.
Wait to drill through the lath; make holes in the plaster until you reach it. Plaster must be adhered to the lath with a specialised adhesive. These specialised adhesives typically come in a caulk-like tube for easy application.
Put the pointed end of your adhesive through the holes you drilled, and then press down to disperse the glue right where the plaster meets the lath.
Special screws designed to hold the plaster in place during the repair process are inserted before the adhesive dries. These screws usually come with large plastic washers and should be installed on either side of the brakes.
These custom-made screws do more than hold the piece in place; they also aid in repositioning the piece to its original location. The screws can be removed, and the surface finished as usual after the adhesive has dried.
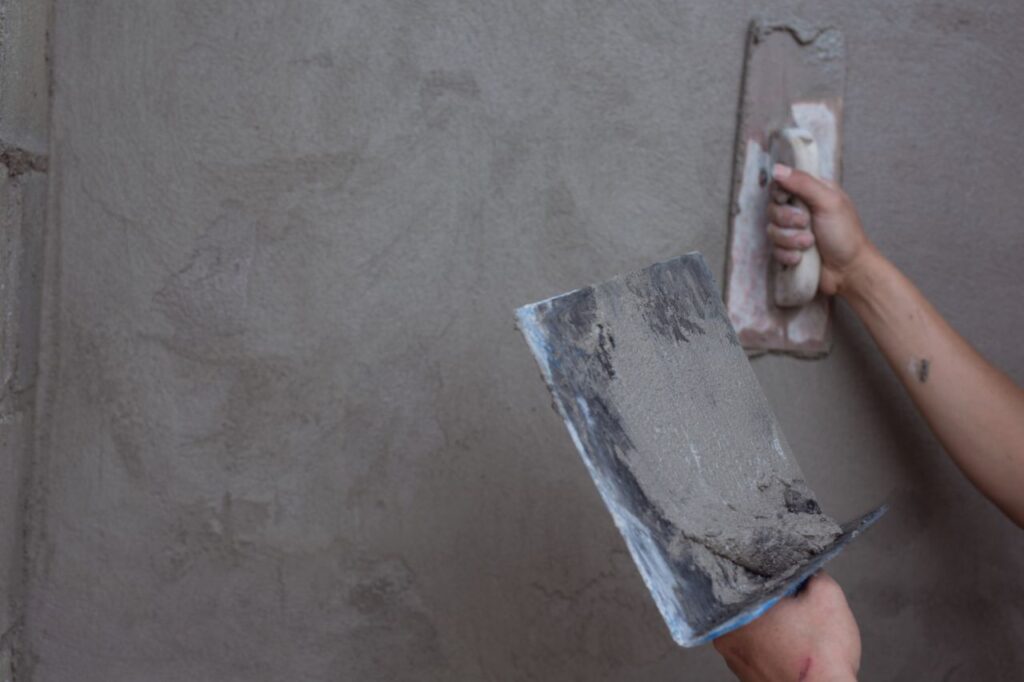
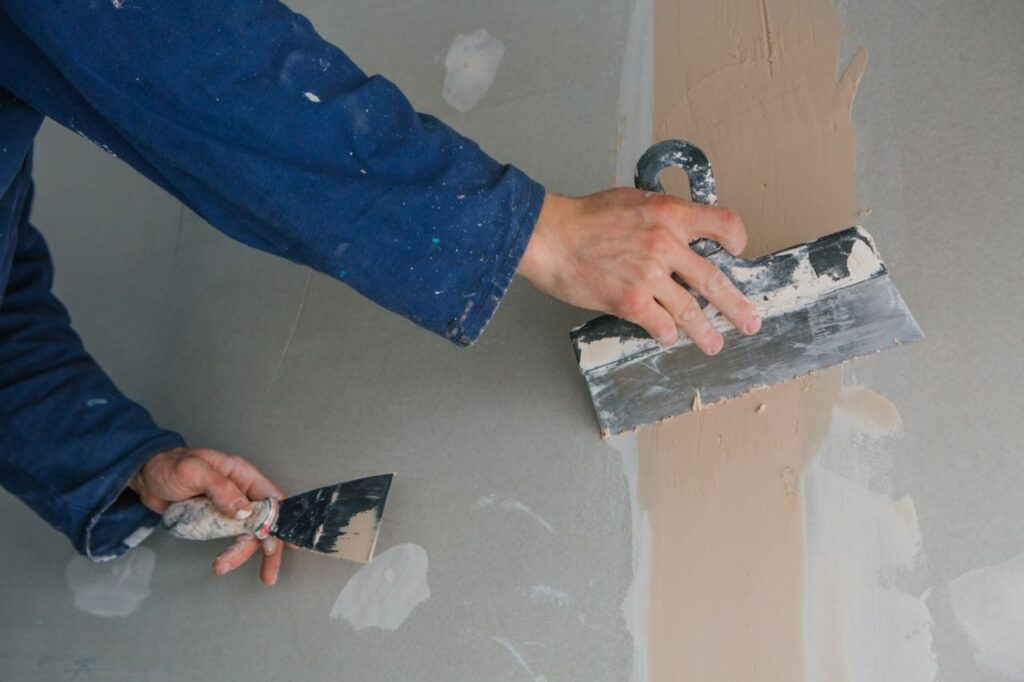
Smooth The Repaired Section With Plaster
After the patch has been repaired, a skim coat should be applied using a trowel. The area can be troweled until it reaches the desired smoothness. It's also important to fill in any low spots so the touchable area is flush with the rest of the wall and the old plaster.
The most important thing to remember is to use high-quality plaster for the repairs, ideally one that matches the rest of the old wall. This ensures a strong bond between the new plaster and the preexisting wall.
Finally, after the plaster has cured as per the guidelines, it can be painted to blend in with the rest of the wall. Again, use a sealer to ensure maximum safety. Instead, invest in high-quality paints that double as sealants.
How To Prevent Plaster Crumbling
The solution to preventing this expensive damage to your plaster, and thus your home's decor, is straightforward. First, prevent the onset of dampness by sealing off potential entry points. Preventing dampness in the houses and especially in the walls, is easier said than done, particularly in older properties, but there are a few extremely useful tips on how to do so.
Velux windows, in particular, can cause a lot of trouble if they aren't installed correctly, so that's the first thing to check. Next, it is highly recommended that you clean the roof's corners of moss and plants, inspect the pipes for leaks, and clear out the gutters, downspouts, and hoppers.
Also, make sure the roof tiles are in good condition. Finally, maintain a consistent temperature inside the house using a thermostat to avoid condensation when cold and warm air meet. Many products on the market claim to prevent water damage to a home by being applied to the exterior walls. However, finding the source of the dampness is essential for a permanent solution, and these products can only provide temporary relief.
Powdery Plaster Fixing
A quick solution may be possible if the issue is relatively minor. The first step in fixing a damp problem is always identifying and eliminating its source. The powdery area can then be cleaned using a solution of four parts water to one part white vinegar. Unfortunately, this solution's unusual pH levels cause the plaster's exterior to harden. After the plaster has dried, a high-quality primer designed for plaster should be applied before the final coat of paint.
Repairing Poorly Powdered Plaster
While the original problem must still be addressed, the response must be far more harsh if the situation has deteriorated to a critical level. First, water damage to the plaster must be stripped away, possibly revealing salvageable wooden lath.
If it's fine, it must be nailed back into place and wet before it can be plastered. Metal lath can be used as a substitute and then covered with plaster. After three weeks of curing, the new plaster should have the same thickness as the old plaster.
Conclusion
Damage to a building's structural integrity and safety caused by crumbling plaster can be expensive and dangerous. When attempting to repair crumbling plaster walls, it is crucial to first conduct an integrity test to ascertain the full extent and location of the damage.
Rake down the powdery wall surface to remove any leftover paint and loose particles, and then install a patch using the same materials as the original plaster once the issue has been located. If the crumbling plaster is due to cracks in the wall, then you should fix those cracks. It is also feasible to fix plaster that has cracked or is otherwise unstable.
Moisture intrusion, structural movement, impact and vibrations, and a lack of care are all contributors to cracking plaster walls.
You'll need a variety of implements and supplies, including a scraper, putty knife, joint compound, paint, primer, vacuum cleaner or brush cleaner, safety gear, plaster repair compound, sanding block and sandpaper, and plastic or drop cloths, to fix crumbling plaster walls.
If you want to find out why something is wrong, you need to check the plaster. Discoloration, stains, cracks, and splits are all signs of water damage. Another sign of eroding integrity is a hollow sound when tapping on a plaster wall.
If the wall exhibits several of these symptoms, it is probably decaying or about to collapse.
In order to determine what's going wrong, an efflorescence test can examine the stability of the plaster. When water seeps into plaster after it has dried, it causes the material to expand, turn colours, and become a nuisance.
Seal any openings in the wall that could allow water in. The plaster has likely delaminated from the wall's underlying structural elements, flaking off a brick masonry wall, and lost its gripping capacity if tapping it produces a hollow sound. Several reasons, such as deteriorating timber laths, stress from home settlement, earthquakes, and ground movement, can cause plaster walls to sag or curve.
Using a builders' brush, rake, and stripping off old paint, remove peeling plaster from the wall in order to repair and patch damage.
Put on a thin layer of plaster and smooth it out with a brush. If the damage reaches deeper than the surface, you will need to scrape it off and then fix the drywall.
Drill drywall screws into the patched area to secure it. Apply a finishing coat of plaster or joint compound over the mended area.
Fill up wall cracks and apply a plaster skim coat to restore its appearance. Fill larger holes with powder for a nice finish. Put back together the cracked and loose plaster by drilling holes in it and glueing it with a specific glue.
Use a skim coat and fill in any imperfections for a flawless appearance. When doing repairs, use high-quality plaster and paint so it disappears into the wall.
To keep water from deteriorating your plaster, you should check your pipes, clean your roof, and empty your gutters, downspouts, and hoppers. Use a thermostat to keep the house at a constant temperature and dry the walls out. Finding and repairing the cause of powdery plaster is a quick and easy task. If the problem is not too severe, you might try cleaning the powdery spot with a mix of four parts water to one part white vinegar. Prime the plaster with a high-quality primer before painting.
To fix badly powdered plaster, you must first remove the water damage to expose the wooden lath, then nail it back into place and dampen it before plastering. Three weeks after application, the new plaster should be the same thickness as the old one.
Content Summary
- Detailed instructions and advice on fixing crumbling plaster walls.
- Conduct an integrity test to determine the extent of plaster damage.
- Identify and fix the underlying cause of plaster issues.
- Remove loose particles and paint from the wall surface.
- Apply a patch using identical materials to the original plaster.
- Repair wall cracks properly to prevent further crumbling.
- Seek expert advice for major wall repairs.
- Moisture infiltration can cause plaster walls to crumble.
- Leaks, excessive humidity, and condensation are common culprits.
- Structural movement, settling, and foundational shifts can lead to plaster damage.
- Impact and vibrations can cause plaster to come loose and deteriorate.
- Lack of maintenance accelerates the ageing process of plaster walls.
- Scrapers and putty knives are essential tools for repairing crumbling plaster.
- Joint compound fills in larger holes and cracks in the plaster.
- Priming and painting the walls are the final steps after repairs.
- Vacuum or brush cleaner to remove loose debris from the wall surface.
- Protective equipment like eye protection, hand protection, and respiratory protection is necessary.
- Plaster repair compound for restoring strength and appearance.
- Sanding block and sandpaper for smoothing the repaired area.
- Sheets of plastic or drop cloths for containing dust and debris.
- Dampness, stains, fractures, and hollow sounds indicate plaster damage.
- Efflorescence can weaken plaster due to soluble salts and minerals.
- Address leaks promptly to prevent discoloured and weakened plaster.
- Hollow sounds suggest delamination between the plaster and the underlying structure.
- Sagging or bowing plaster can indicate rotting wooden laths.
- Cracks in plaster walls can result from house settlement and ground movement.
- Remove flaking plaster and paint from the wall surface.
- Repair damage below the surface by scraping and patching.
- Use drywall and screws to fill in gaps and secure the damaged area.
- Skim coats or joint drywall compounds are not suitable for repairing cracks.
- Extend the plaster skim coat to hide cracks and achieve a smooth finish.
- Holes can be fixed by cleaning, filling with plaster or joint compound, and adding a finishing coat.
- Broken plaster keys can be fixed by drilling, applying adhesive, and securing with screws.
- Smooth the repaired section with a trowel and ensure a strong bond with the old plaster.
- Use high-quality plaster and sealer for the best results.
- Prevent plaster crumbling by sealing potential entry points for dampness.
- Check and fix Velux windows to prevent water intrusion.
- Clear roofs of moss and plants and inspect pipes, gutters, and downspouts.
- Maintain a consistent temperature to avoid condensation.
- Identify and eliminate the source of dampness for a permanent solution.
- Clean powdery areas with a water and vinegar solution before priming and painting.
- Strip water-damaged plaster to reveal salvageable wooden lath.
- Nail and wet the lath before applying new plaster.
- Consider using metal lath as a substitute for damaged wooden lath.
- Allow the new plaster to cure for three weeks to match the thickness of the old plaster.
- Properly addressing the original problem is crucial for long-term solutions.
- Apply a high-quality primer designed for plaster before painting.
- Seek expert help if the plaster damage is critical or extensive.
- Regular maintenance and prompt repairs can prevent plaster from crumbling.
- Take necessary precautions and use appropriate tools and materials for successful plaster repairs.
FAQS About Plaster Walls
Yes, it is possible to stabilise loose plaster without removing it completely. There are techniques available to secure and reinforce loose plaster without requiring complete removal. One common method is injecting an adhesive or consolidant into the gaps or cracks behind the loose plaster.
This adhesive helps to bond the plaster back to the underlying substrate, providing stability and preventing further deterioration. It is important to follow the instructions provided by the adhesive product manufacturer and ensure proper application for effective stabilisation. However, it's important to note that the success of stabilising loose plaster depends on the extent of damage and the condition of the plaster. In some cases, consulting a professional plaster repair specialist may be recommended for the best results.
Applying a primer before repairing the plaster is not always necessary, but it is generally recommended. Primer serves as a preparatory layer that helps promote better adhesion and enhances the durability of the repair. It creates a suitable surface for the repair material to adhere to, ensuring a strong bond.
Additionally, primer can help seal the repaired area, preventing moisture penetration and further damage. While it is possible to skip the primer in certain cases, using a primer before repairing the plaster is a good practice that can contribute to a more successful and long-lasting repair.
Yes, you can use joint compound or spackle to fix the crumbling areas of plaster. Both joint compound and spackle are commonly used for repairing minor cracks, holes, or damaged sections in plaster walls. They are easy to apply and help fill and smooth out the damaged areas.
A joint compound is typically used for larger repairs and has a thicker consistency, while spackle is more suitable for smaller repairs due to its smoother texture. Following the manufacturer's instructions for application and drying times is important. However, it's worth noting that for more extensive or structural repairs, it may be advisable to consult a professional plaster repair specialist for the best results.
When repairing crumbling plaster walls, it is important to avoid the following common mistakes:
- Insufficient surface preparation: Neglecting properly cleaning and preparing the damaged area can result in poor adhesion and unsatisfactory repair. Before starting the repair process, ensure the surface is free from loose debris, dust, and old paint.
- Overloading with repair material: Applying too much joint compound or spackle at once can lead to excessive buildup and an uneven finish. It is best to apply multiple thin layers, allowing each layer to dry before adding more.
- Inadequate feathering: Failing to feather the edges of the repair outward can create noticeable ridges or a visible transition between the repaired area and the surrounding wall. Take the time to blend the edges smoothly for a seamless result.
- Skipping sanding between layers: Sanding between layers of repair material helps create a smoother surface and removes imperfections. Complete this step, which can lead to a rough or uneven texture.
- Not matching the original texture: Carefully observe the existing texture of the surrounding wall and try to replicate it as closely as possible. Failing to match the texture can result in a visibly different patch that stands out.
The time required to repair crumbling plaster walls can vary depending on the extent of the damage, the size of the repair area, and the specific repair techniques used. In general, smaller repairs can be completed within a few hours or a day, including the drying time of the repair material.
However, more extensive repairs may take multiple days or weeks to complete, especially if multiple layers of repair material are needed. It is essential to follow the instructions provided by the manufacturer of the repair materials and allow sufficient drying time between layers. Patience and attention to detail are key to successful and long-lasting repair.